In this post, I share a recent return to chine-collé, a printmaking method that lets you combine collage elements directly into a print. With Japanese Moriki paper, watercolor pencils, and a game-changing new adhesive, I reworked older woodcuts into vibrant new pieces. Read on to learn about the materials, techniques, and surprises from the studio press bed.
Lately, I’ve been diving back into chine-collé, a technique I love for its ability to combine collage and printmaking in a single press run. If you’re not familiar with it, chine-collé (pronounced “sheen-koh-LAY”) comes from the French words chine (meaning thin tissue) and collé (glue or paste). It allows you to embed delicate papers—often colored or textured—into a print, adding depth and subtle layers of color that interact with the ink in unpredictable and exciting ways.
This time around, I revisited some of my recent woodcuts, reprinting them using chine-collé. The results felt entirely different—more layered, more atmospheric, and with a new kind of visual energy.
One new element in my process came thanks to my longtime mentor, the legendary printmaker Kathy Caraccio, who introduced me to Gudy 870 (also called Gudy O). It’s a super-thin, acid-free mounting adhesive that functions like double-sided tape—only without the plastic carrier layer. It’s archival (pH neutral) and doesn’t require a heat press, which makes it ideal for chine-collé. You just apply it to your thin paper, peel off the backing, and it’s ready to adhere when it goes through the press.
For this project, I used Japanese Moriki paper in rich yellow and brown tones. I added layers of color using watercolor pencils, blending them to create subtle shifts and patterns. These papers, once treated with the Gudy adhesive, were laid into the woodcut composition and pressed onto BFK Rives, my go-to base paper. The interaction between the watercolor pencil, the ink, and the thin Moriki paper created a complexity I couldn’t have achieved with ink alone.
Of course, there are many approaches to chine-collé—some artists use methyl cellulose or PVA glue, both of which are archival. But for this kind of crisp, dry application, I find Gudy works best for me. It’s a little tricky to apply without trapping air bubbles, but with some practice (and a few YouTube tutorials), it’s totally workable.
What I love most about this process is how experimental it feels. Each print is a bit of a surprise—a collaboration between paper, ink, pressure, and patience. And, as always, the process is as important to me as the final image.
Want to see the finished prints?
Check out the latest pieces from this series [ WE LIVE TOGETHER ] or follow me on Instagram [@carolmorrisonart] for behind-the-scenes images from the studio. Thinking about trying chine-collé yourself? I’d love to hear from you!
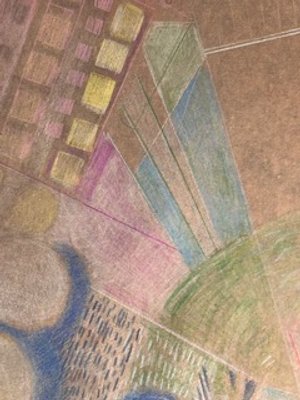
A
The brown Moriki paper (see A) was colored with watercolor pencils. Then the Gudy 0 was adhered to the Moriki paper (on the non-colored side.) The BFK Rives printing paper was then placed over the inked board and the magic happened.

B
The Gudy 870 was applied to the Morki paper (see B.)
And when it rolls off the press, it is perfectly adhered (see C.)
Another great day in the #printshop
C
#chinecolle #chinecoll #fineartprintmakers #chinecolleprints #kathyprint #carolmorrisonart #BFKRivespaper #morikipaper #japanesepaper #contemporaryart #contemporaryprintmaking #fineart #chinecolleprints #printmakingart #printstudio #printmakingprocess #mixedmedia #woodcut #womenprintmakers #artcollector #contemporaryartcollectors #artonpaper #experimentalprintmaking #worksonpaper #womenartists